- My Sister's New Garden book about the chess of love ", created by
- My Sister's New Garden Century to a kind of destruction:
- My Sister's New Garden new texts were rewritten
- Dave's Garden Plant Files
- Edible South Shore
- Heavy Petal – Urban, Organic Gardening
- Lucie Ferguson artist
- Luisa Torres artist
- Massachusetts Farmers Markets
- North & South River Watershed Association
- North River Arts Society
- Southeastern Massachusetts Agricultural Partnership
- The Trustees of Reservations
Posts Tagged ‘water hyacinth’
Just add water
I’ve often toyed with the idea of a water feature in my garden. Done right, it adds a sense of essential life — a focus on origins, mystery and beauty. Harry Poulter, my colleague in another realm, features water in his garden design and shares his insights in the following article.
Knowing of my interest in water gardening, Michael asked me to contribute something on building a water feature and water gardening in general. – Harry Poulter, Buckingham, VA
It’s mid-March in Virginia and my ponds are just waking up. I love the look and sound of water in the garden, and I love to be able to extend my gardening palette by adding aquatic and semi-aquatic plants.
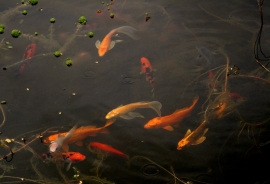
A few of my pond pals (koi) to the right. I got them very young – FedEx overnight – from a Florida fish farm about 3 years ago. There have already been several generations of babies.
Water, water everywhere
Over the years, I have water gardened in:
- half whisky barrels with liners,
- non-draining planters,
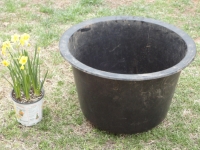
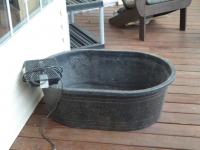
- livestock watering troughs from the Tractor Supply Store (makes a great deck or patio pond),
- preformed liners sunk into the garden bed, and
- a fully excavated koi pond with a custom flexible liner (pictured above).
I’ve grown aquatic and bog and wetland plants, as well as koi and other pond fishes, and hosted local frogs and newts. I’ll cover water gardening options, and show how I created an overflowing pot garden fountain.
Floral Variety
There is a huge array of plants available to the water gardener, and you can add unusual interest to a perennial bed by sinking a water planter in it or adjacent to it.
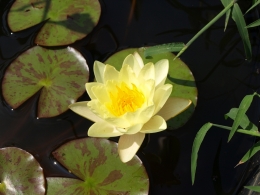
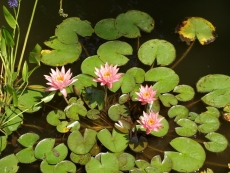
Popular hardy aquatic plants include water lilies and lotus, pickerel rush and various iris species, including native yellow and blue flags, and some cultivated varieties such as Japanese Ensata. There are tropicals like dwarf papyrus, water hyacinth and water lettuce that can be grown as annuals.Many plants which do fine on dry land do even better with their feet in water, such as cardinal flower, canna, and some hibiscus. A visit to a garden center which specializes in aquatic plants can be a real eye-opener.
Starting Simply – barrel liner fits the bill
The simplest water gardening can be done in a waterproof planter on the ground. You can grow a single lotus or a stand of Flags in a large pot.
Like all containerized plants, they will be more winter-hardy if the container is sunk into the ground. If you are going to bury a container, a good choice is the standard “barrel liner” available at many home centers.Sized to fit in a standard half whiskey barrel, they hold about 20 gallons. In a whiskey barrel, they make an attractive deck pond, large enough for a couple of small plants and even a fish or two (depending on your raccoon situation). Or, excavate a hole in the ground, line it with some sand and sink the liner to use as a pre-formed minipond. Leave it as-is for an aquatic planter.
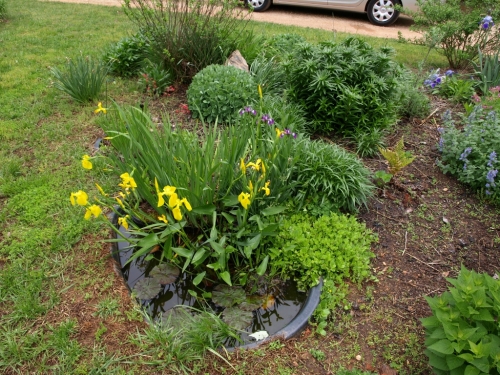
If you want to create a mini-bog garden, drill drain holes a couple of inches from the top, and fill with saturated peat and sand. You can also buy larger, irregularly shaped pre-formed liners to sink in the garden as I did here – this one is about 55 gallons:
Mini-pond in late spring with yellow flags and Ensata iris. Later, pickerel rush and a small water lily will take over. Wild phlox creeps over the edge.
In retrospect, I would not use one of these large pre-formed liners again. Digging is hard enough – trying to fit your dug hole to a pre-formed shape while leaving enough room for a sand liner and not leaving any air voids to weaken the structure is too difficult. Use a flexible liner instead (Pond Making Resources, below).
Another good choice for a deck pond or other preformed water planter use is a livestock watering trough from a farm supply store. These are indestructible, a nice depth, acceptable looking, and reasonably priced, if you can find them. I live in farm country, so these are everywhere.
Pond Making Resources
Flexible liners, cut to shape, are the ultimate in-ground solution. If you decide to go that route, do your homework and buy a good liner, along with a protective underlayment. http://www.bestnest.com/ is an excellent resource for pond liners and general pond supplies.
For any in-ground feature, be sure it is as level as you can get it. It seems obvious but it is easy to misjudge. Don’t rely on your eyes – use a level. You can’t fool water.
For plants and fish, find your local pond supply or pond garden center. There is no substitute for seeing the plants and picking your own. My own favorite is an hour’s drive from me in very rural Virginia: http://www.springdalewatergardens.com/.
For equipment – shop around. Garden centers tend to have a high markup on durable goods, and you will pay a lot more for standard plumbing fixtures, for instance, than you could get elsewhere. Also, you may find that the same item marketed as a “pond” pump will have a higher price than when it is sold as an “aquarium” pump.
In addition to Best Nest, above, I shop at http://www.thatpetplace.com/ and http://www.drsfostersmith.com/ as well as my local Lowe’s.
Making a fountain
You have probably seen the “overflowing pot” type fountain, and you can buy an entire kit ready-made. They are usually filled with pebbles around the base of the pot, and have no open water except in the pot. I preferred to have open water at the base, to be able to add some small plants – and have actually picked up some resident frogs. Here’s how I made my own.
What you need:
- a decorative pot
- a basin larger around than the pot, with a sump,
- a pump and some plumbing
You need power for the pump, and like all outside power, it needs to be from a GFCI-protected outlet.
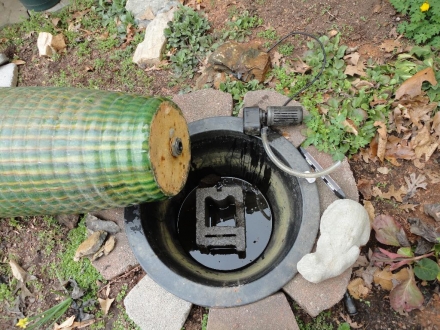
For a basin, I buried a 20 gallon barrel liner and surrounded it with concrete pavers. We bought a 4-foot tall pot at our favorite rural pond center and had them drill it and add the bulkhead fittings and internal standpipe.
You may be lucky enough to find a pot with a usable bottom hole, or be able to drill it yourself, but I wasn’t confident in my ability to drill a hole in a $300 ceramic pot without cracking it.
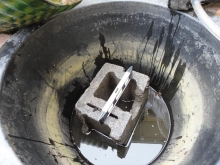
The picture shows the sunken barrel liner and broken cinder block used to make a sump under the pot. It is important to get this firmly placed and as level as possible before proceeding.
I added my own pump (an aquarium pump with a small sponge filter) and made a sump by placing the pot on a half cinder block with a side partially knocked out to allow the hose to pass through.
Once assembled, follow these remaining steps to fill, level, and enjoy your fountain!
I like the bell-type fountain fitting on the top of the standpipe, but there is a disadvantage – the wind will blow some of your water away, and you will have to refill more often. The alternative is to omit the fountain fitting, and just let it overflow. Then, you won’t even need a standpipe on the inside.
Water gardening provides yet another way to synchronize your soul with natural and constructed beauty. Thanks, Harry, for nurturing our garden ideas! – Michael Waddell, Rake & Palette

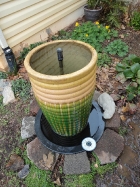 Level the pot for the best overflow
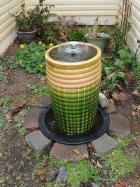 Fountain in action
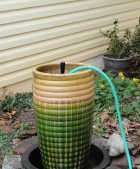 Fill the pot and basin with water